THL Screen Replacement Guide for iPhone 7 Plus
THL Screen Replacement Guide for iPhone 7 Plus

THL is a technology based enterprise focusing on the research and development, production and sales of mobile screen assembly. THL is committed to providing high-quality mobile phone screen assembly, professional technical support and responsible after-sales service for global mobile phone accessories wholesalers and mobile phone repair shops.
Buy iPhone 7 Plus Display click here: https://www.thldisplay.com/collections/thl-for-iphone-7-plus-displays

THL's screen repair experts guide you how to replace the screen step by step:
BEFORE YOU BEGIN..
1.Discharge your phone's battery to less than 25%.
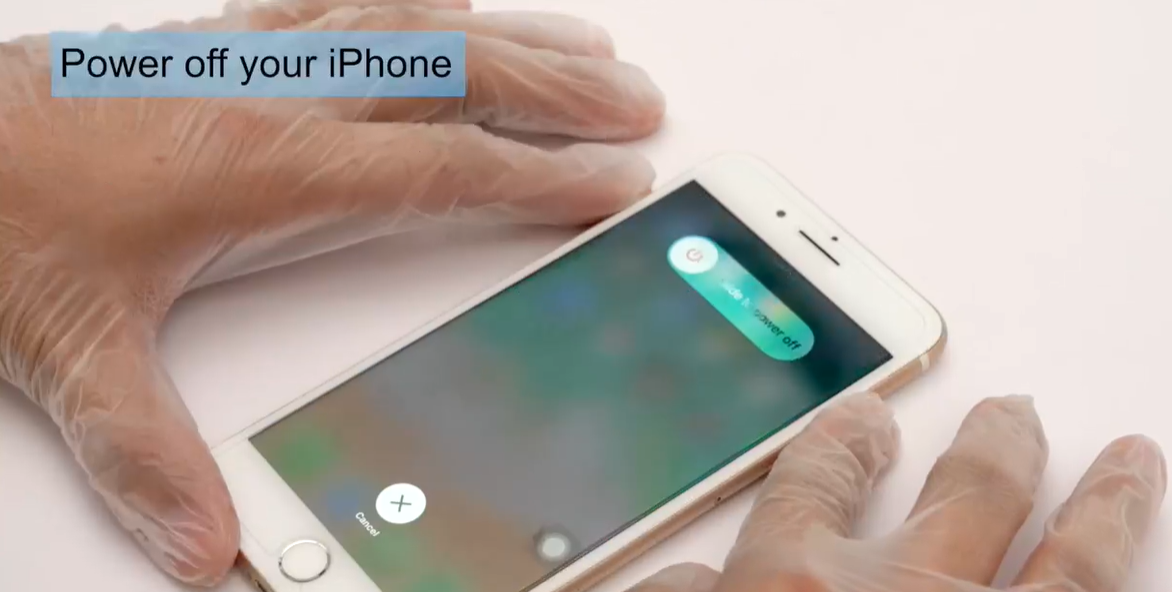
2.Power off your phone.
3.Wear eye protection and ESD Gloves/Bracelet
WHAT YOU WILL NEED
Toolset(included), Hairdryer or Heat Gun ESD Braceletor Gloves
Eye Goggles Packing Tape Tweezers


How to Replace an iPhone 7 Plus Screen: DIY Guide
iPhone 7 Plus Screen Replacement, If an accident caused damage to your iPhone 7’s screen and is impairing usability, you’ll want to have it repaired or replaced.
Please follow the suggestions below: (for reference only)
1. Power off the iPhone 7 Plus.
2. At the bottom of the phone locate the two pentalobe screws and remove using a TS1 (0.8mm) screwdriver.
3. Place a suction cup directly on the display, above the Home button and gently try to remove from the rear casing.
4. If necessary, use a wedging device to carefully break the seal of the adhesive and pry the display from the rear casing.
5. Open the iPhone 7 Plus like a book.
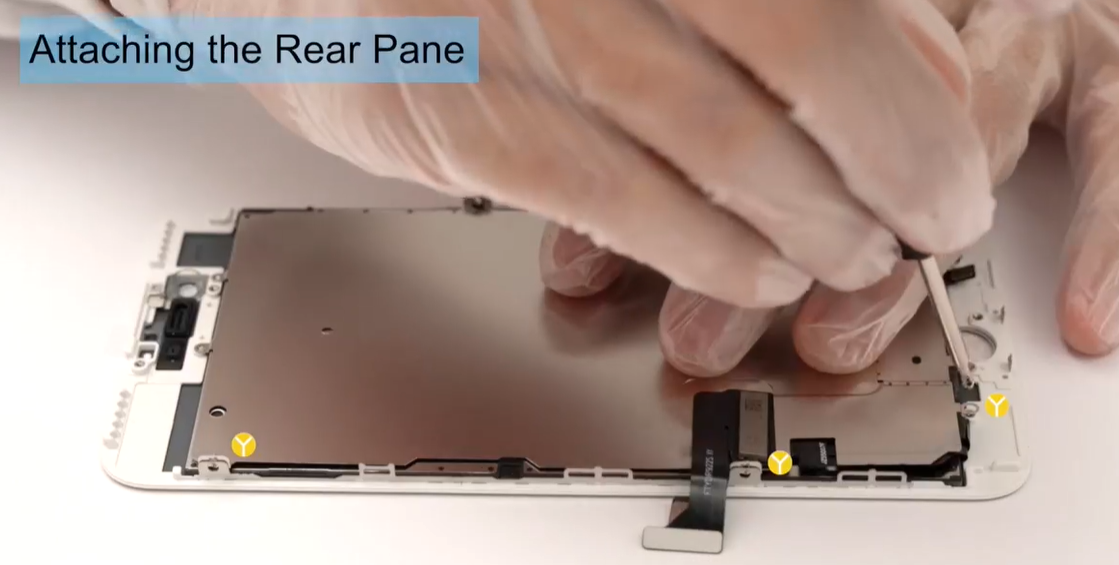
6. Remove the four, tri-point screws to free the display plate.
7. Use tweezers to lift the display plate away.
8. Then, use your wedging or spudger tool to pop off the three LCD connecting cable strips.
9. Unscrew two more tri-point screws at the top, right-hand corner that hold down your proximity sensor.
10. Remove the plate over the proximity sensor reveal one more cable strip that, when disconnected, will free the front display from the back of the phone.
11. Remove the three Phillips-head screws from the bracket behind the ear speaker at the top of the display side.
12. The bracket will pull away revealing the iPhone’s camera.
13. Pull back the camera to remove the two screws holding in the ear speaker assembly.
14. Lift the ear speaker out.
15. Gently wiggle and pull up on the proximity sensor to remove it.
16. At the bottom of the display side, locate the touch ID assembly.
17. Unscrew the four tri-point screws holding down the bracket.
18. Remove bracket.
19. Gently wiggle to remove touch ID, which will slide out the front.
20. Then remove the LCD back-plate by unscrewing six, tri-point screws.
21. Using your wedging or spudger tool, lift up the LCD back-plate to reveal the cable strip connected to back-plate.
22. Once you free the LCD back-plate of the cable, it should disconnect easily.
23. Discard your old, damaged LCD and replace with the new screen, folding down your cables and lining up the side mounts, to put the 6 screws back into place.
24. Continue to follow the steps in reverse to reassemble the phone.


Comments
Post a Comment